After having problems with my GoPro Hero 8 cameras, I’ve decided to upgrade my action camera setup. The cameras that I am now using include the Insta 360 One RS, the Insta 360 OneX2 and the DJI Osmo Action 3. I also use a variety of RAM mounts to attach everything to the motorcycle including the controller for my DJI drone. I’ll include links to these products for your convenience. I’ll include links to these products for your convenience.
Action Cameras
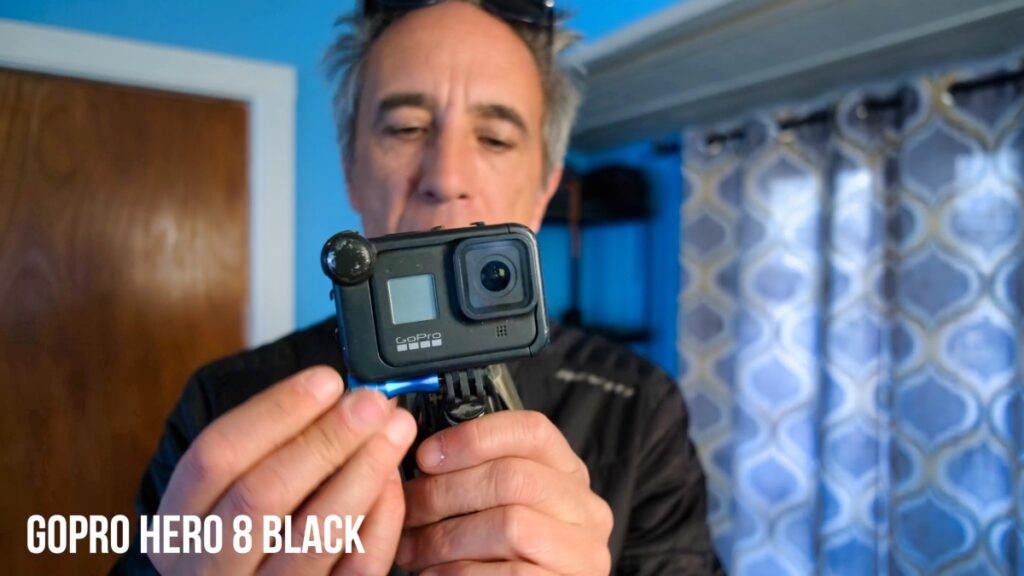
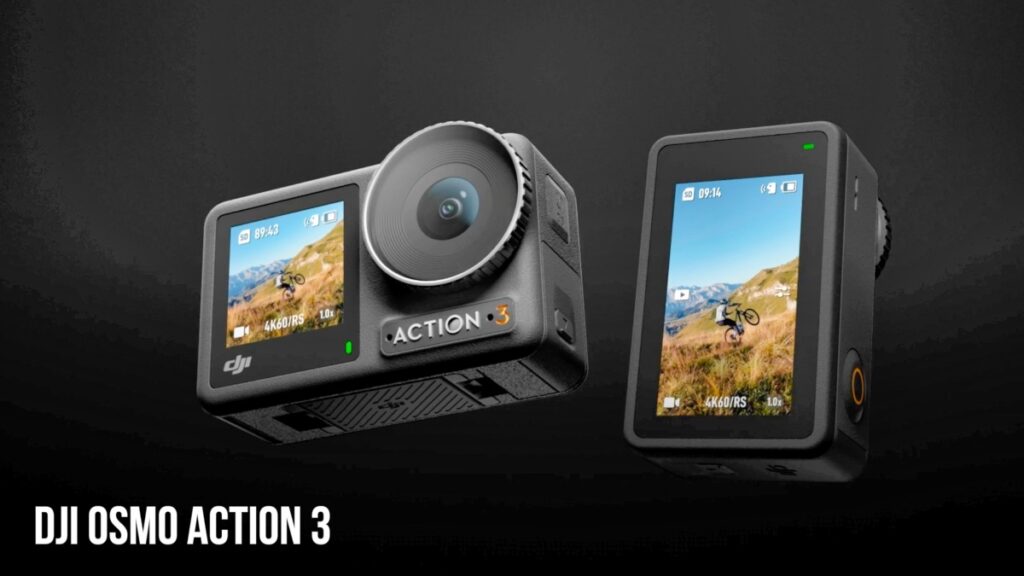
These are the three cameras that I use for motorcycle travel vlogging, or moto vlogging. I’ve been using the GoPro Hero 8 Black for about three years and it has been a rugged, reliable camera for the most part, except for the annoying issue where it freezes for no apparent reason which requires removal of the battery to get it going again. Other than that issue, it has been a great little camera. I’m now using the Insta 360 One RS and the DJI Osmo Action 3, both of which seem to meet my needs.
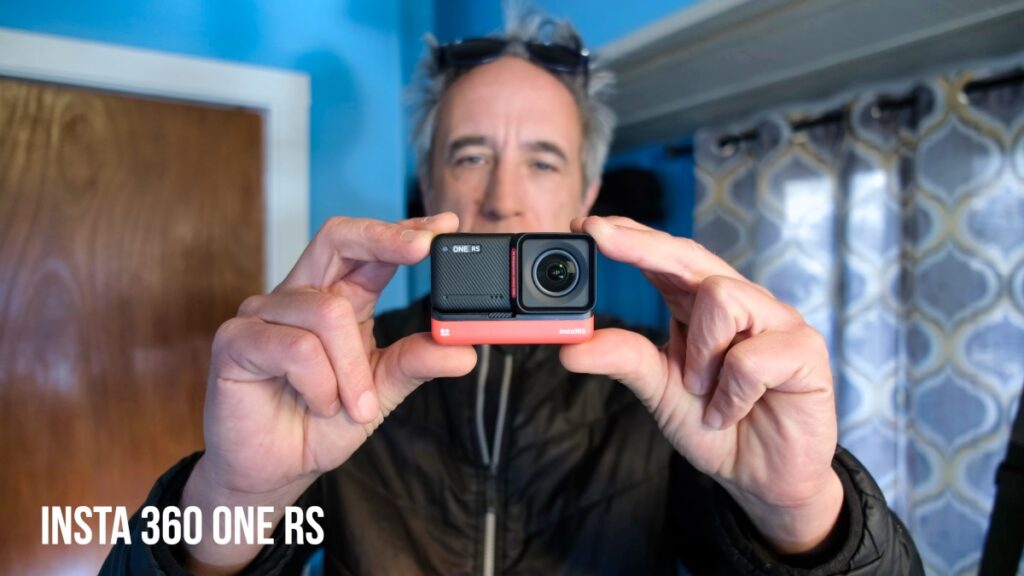
Insta 360 One RS
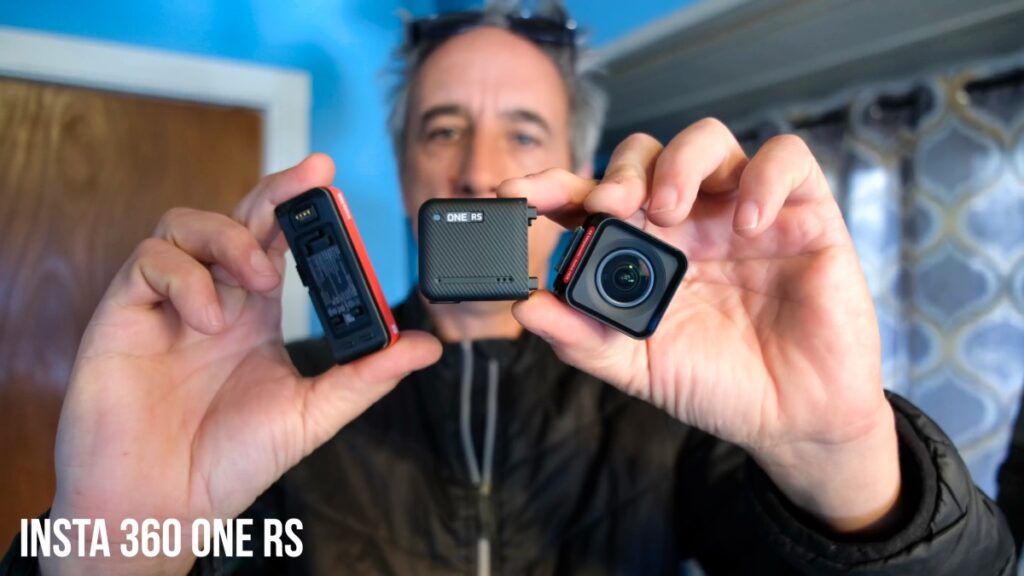
The One RS is a modular camera which means that you can take it apart and reconfigure it with different lenses including an optional 360 degree lens or a higher quality one inch lens. You can also change the LCD touchscreen to face either the front or rear of the camera. It’s nice to have that option, although I would prefer a camera that has both a front and rear LCD screen to begin with, like the DJI Osmo Action 3.
Insta 360 One X2

I’m also using the Insta 360 One X2 camera which is something a little bit different with it’s ability to capture a 360 degree field of view. The creative possibilities with this camera are certainly an advantage, but it does require a little more time to edit the footage and the overall image quality is not quite on par with a normal 4k action camera like the ones above.
Mounting Solutions
I use a variety of mounts to attach the cameras to my motorcycle, my helmet or various tripods and selfie sticks that I use when moto vlogging. It’s important for me to be able to quickly and easily change the position of my cameras, so that I can capture the action from various points of view. I don’t want waste time fiddling with connectors and adpaters when I’m tryiong to get the shots I need.
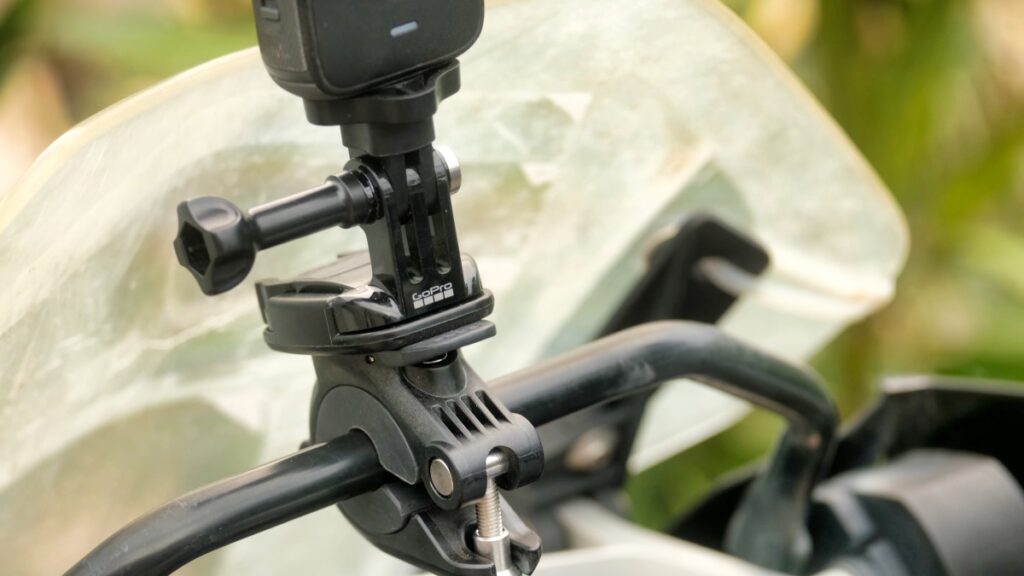
GoPro mounts are a standard and there are a wide variety to choose from. They are all pretty universal and there are several options including mounts for handlebars, magnetic or adhesive mounts. All of the action cameras I use have some degree of compatibility with GoPro mounts.
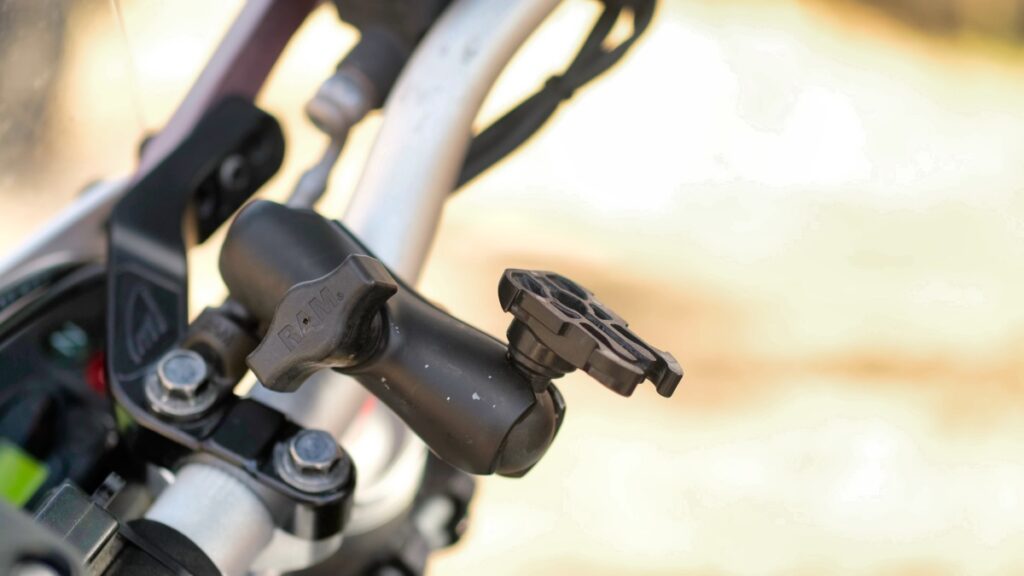
RAM Mounts
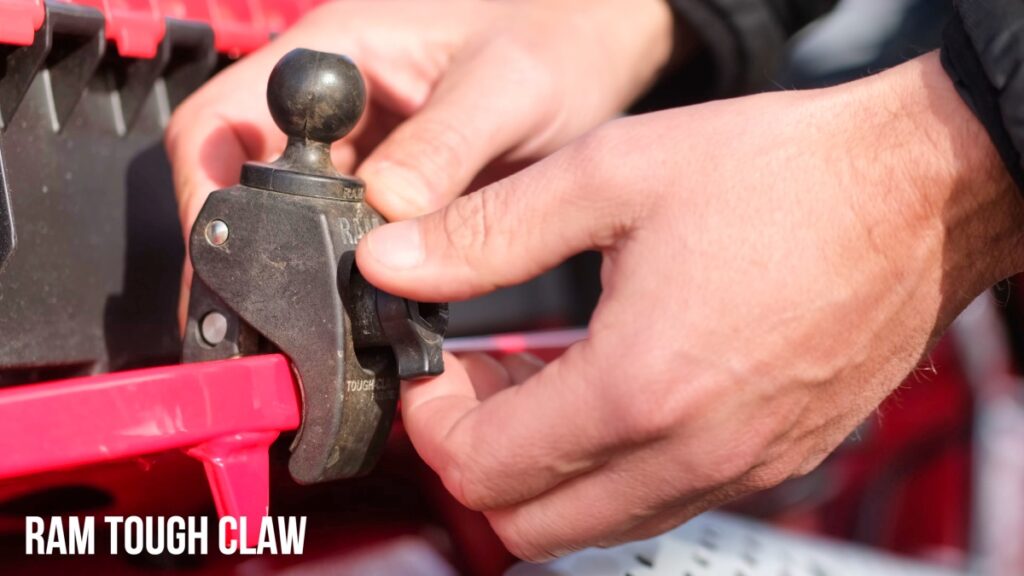
RAM mounts are another important part of the equation. I have been using RAM mounts for over 20 years and find their products to be nearly indestructible. They offer a wide range of products suitable for a variety of applications. Above, you can see the RAM Tough Claw that grabs onto any kind of tubular frame. The ball at the top is a 1″ type-B RAM ball which is designed to work with a compatible RAM Arm. This ball-and-socket configuration is the basis of RAM mounts.
Selfie Stick Problems
Here, I have an Insta 360 invisible selfie stock attached to the RAM Tough Claw on the back of my Honda Trail 125 motorcycle. This configuration works well and can be removed easily, or attached to other places on the bike. As a side note, I’ve found that this selfie stick does not like to stay extended when riding over tough terrain. The vibrations cause the stick to de-extend over time.
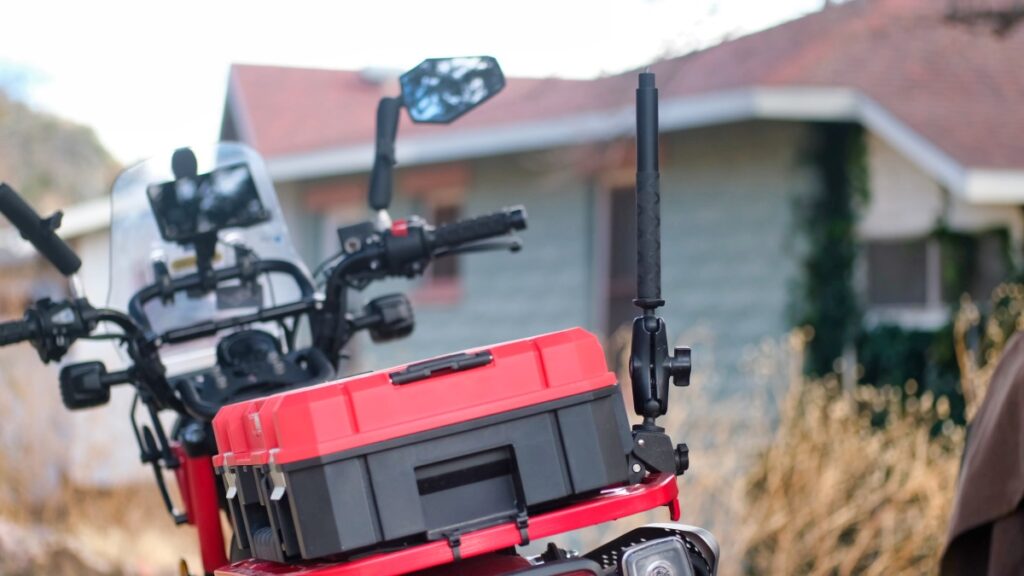
Drone Controller Mount
Here’s a mount that I made for my drone controller, so that it is conveniently and securely attached to the handlebars of my motorcycle. I attached a RAM Mounts RAM-B-272U 9mm Angled Bolt Head Adapter Ball Base with a B Size 1″ Ball to my motorcycle (under the handlebar clamp bolt), a RAM Mounts RAP-B-201U Composite Double Socket Arm and a RAM Mounts Ball Adapter for GoPro Mounting Bases. I put an adhesive GoPro mount on the back of the drone controller which allows me to connect the controller to this setup and it works well.
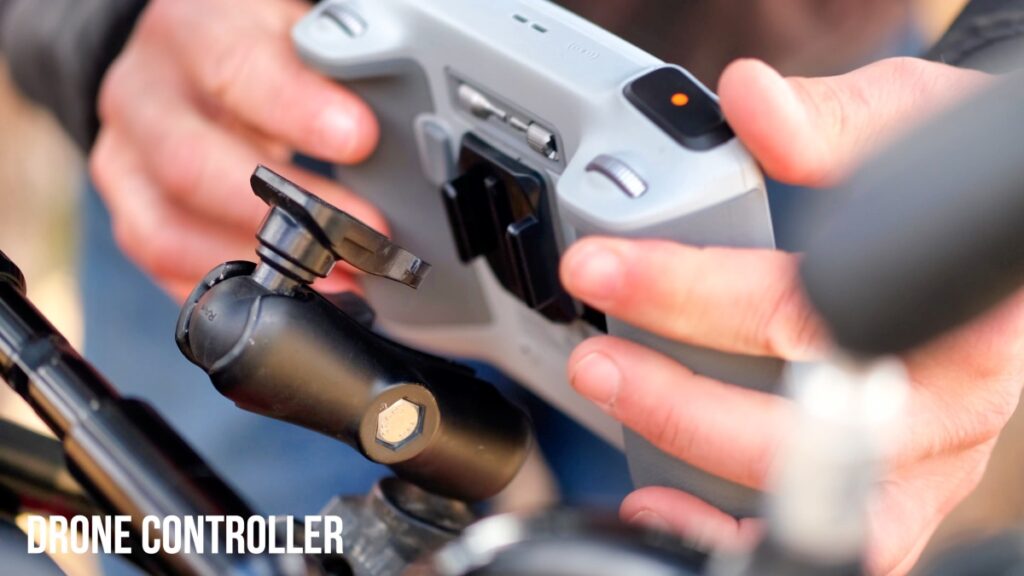
Here you can see the back of the controller, with the GoPro adhesive mount attached, ready to be attached to mount on my motorcycle.
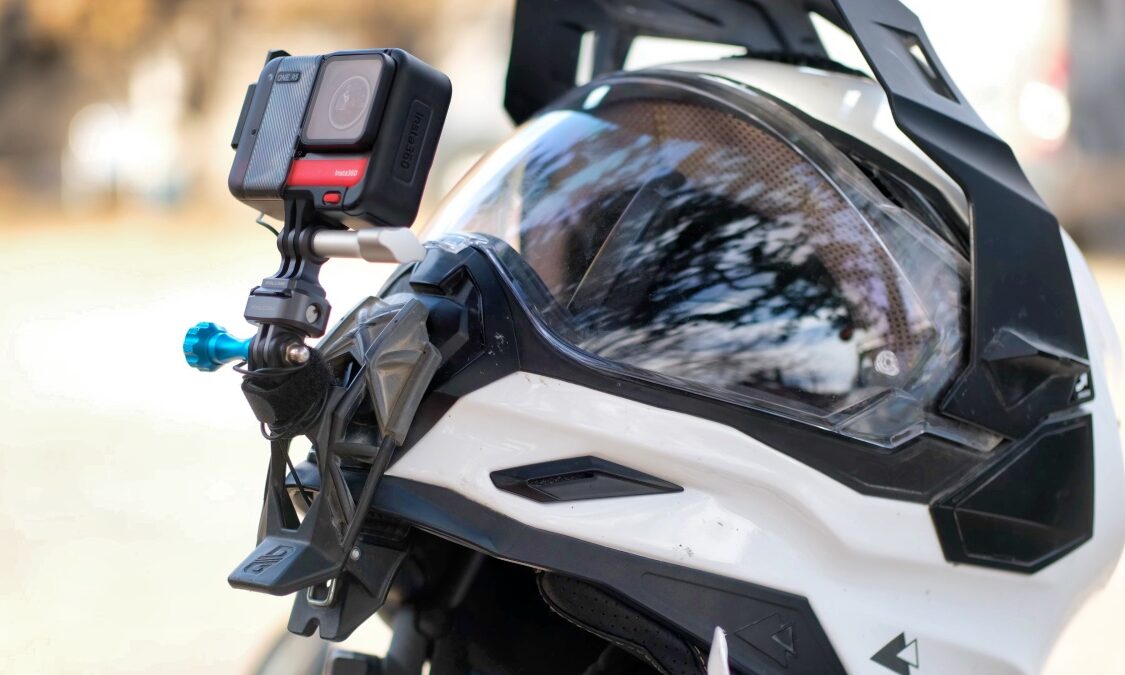
Helmet Camera Mount
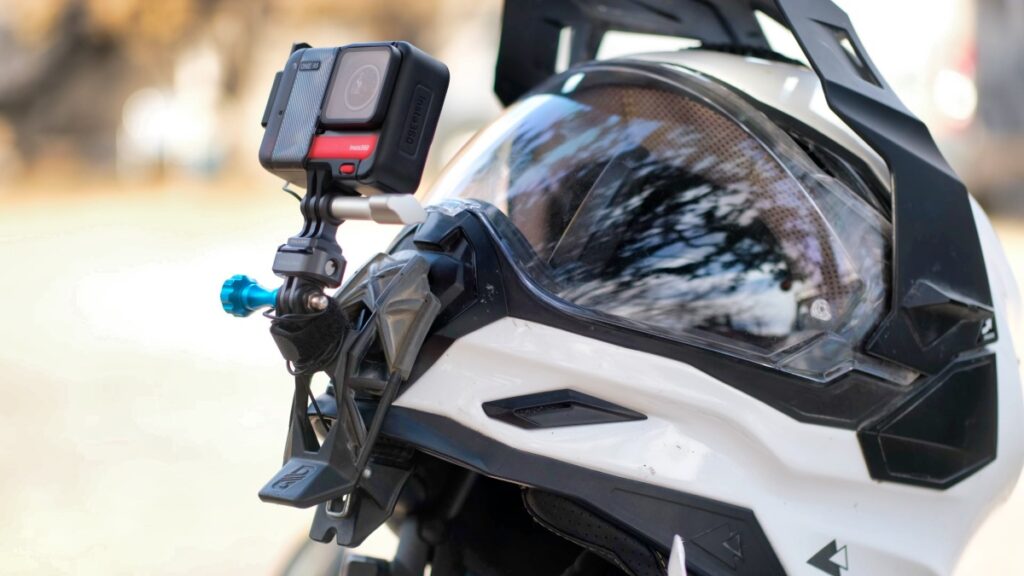
I use a Dango Designs Gripper Mount to attach the helmet camera to my motorcycle helmet. I’ve been using this mount for about three years and it works great. It is easy to use and I don’t have to have anything permanent on my helmet. I can remove it easily but it also holds tight when it is in place.
Quick-Release Mounts
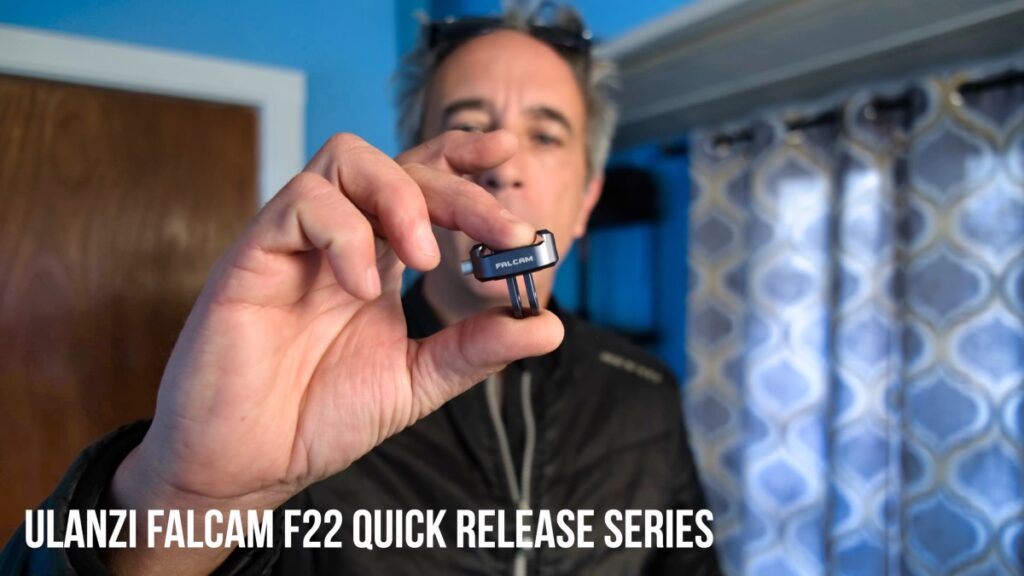
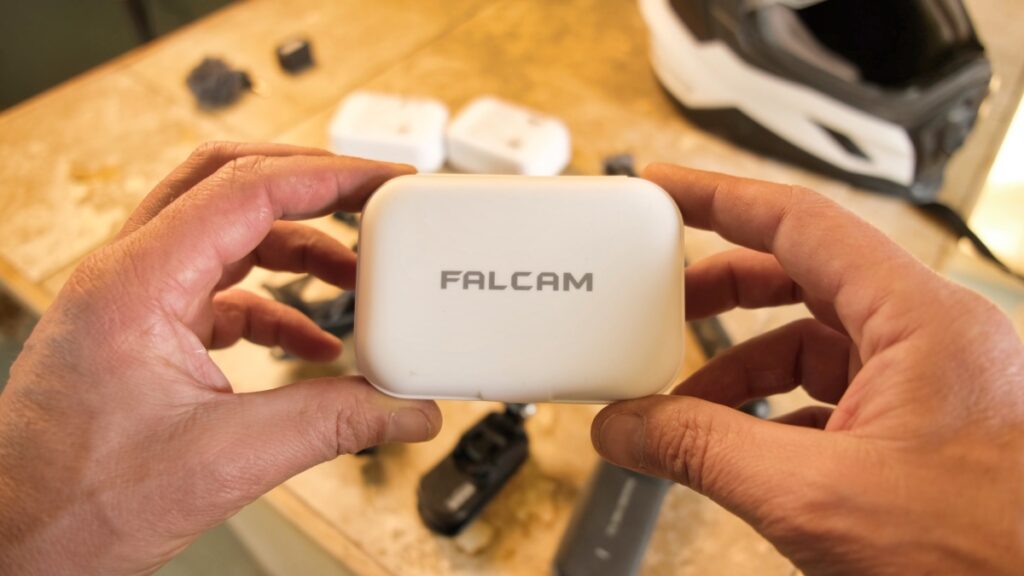
Something new that I have been using are the small and rugged Falcam F22 series quick-release mounts. These allow me to quickly and easily attach and unattach all of my cameras from the various mounts that I use. I bought a ton of these little mounts from Ulanzi.com and they work really well. It’s so nice to be able to quickly change my set up, without having to screw and unscrew the GoPro mounts like before.
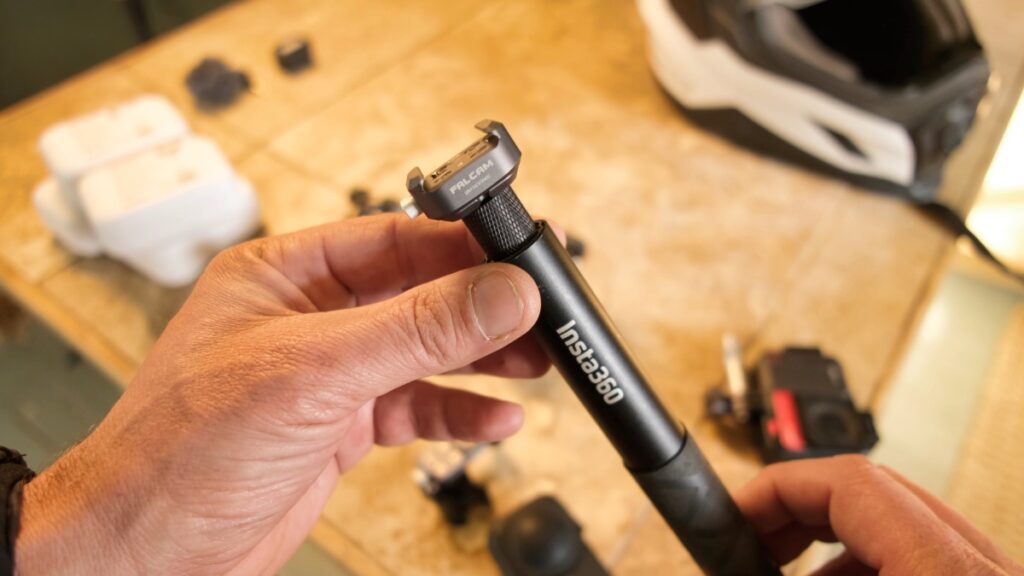
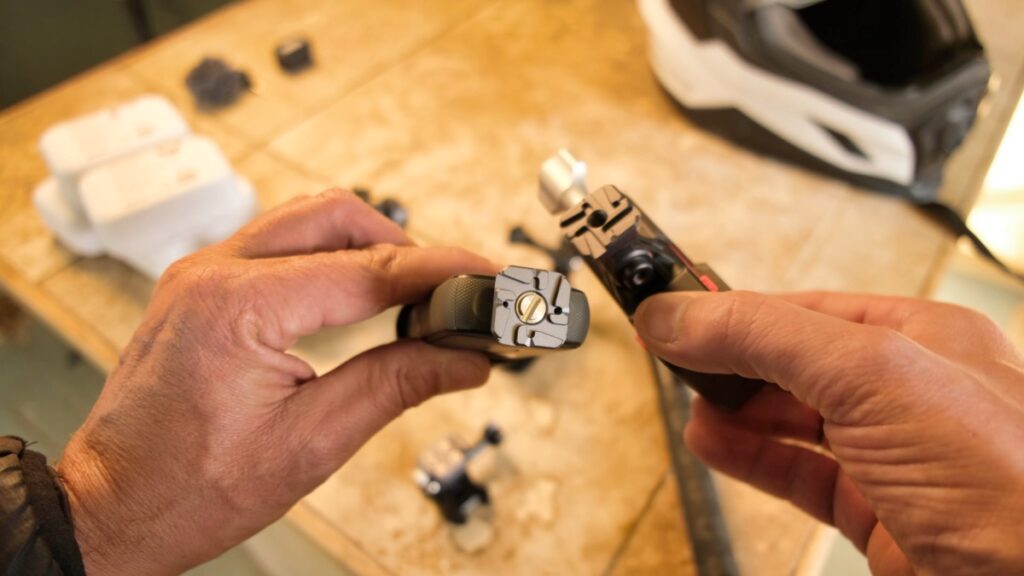
I use the FalCam mounts on everything. All of my cameras have them, along with my tripods and selfie sticks. They are rugged and lightweight and easy to use.
Dango Designs Gripper
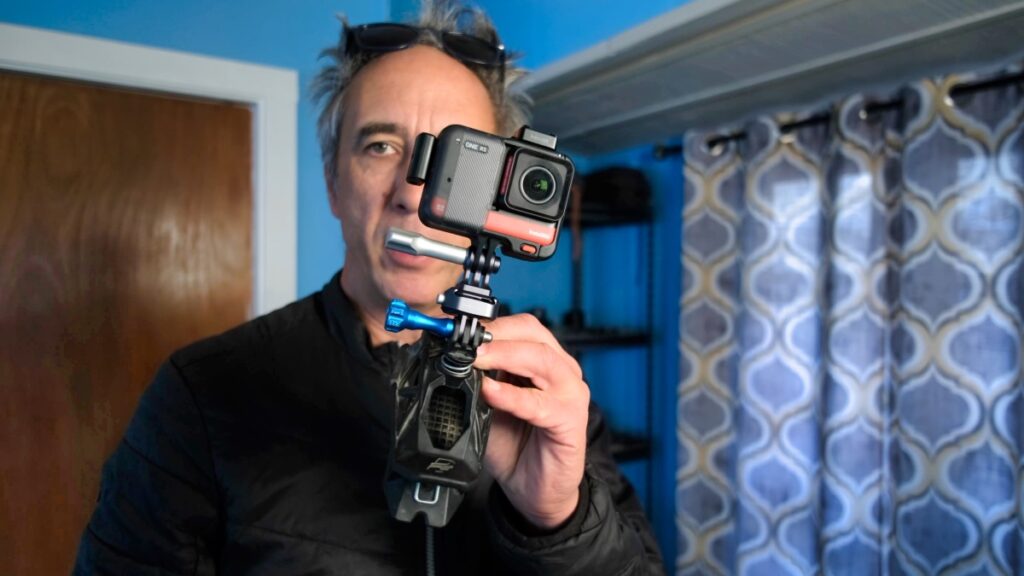
Here is my Insta 360 One RS action camera attached to the Dango Designs Gripper with the Falcam quick-release in between. This has the added benefit of raising the camera up a little bit higher which means that I can see the back LCD screen on the camera when I am riding, and know when I am recording or not.
Helmet Camera Audio
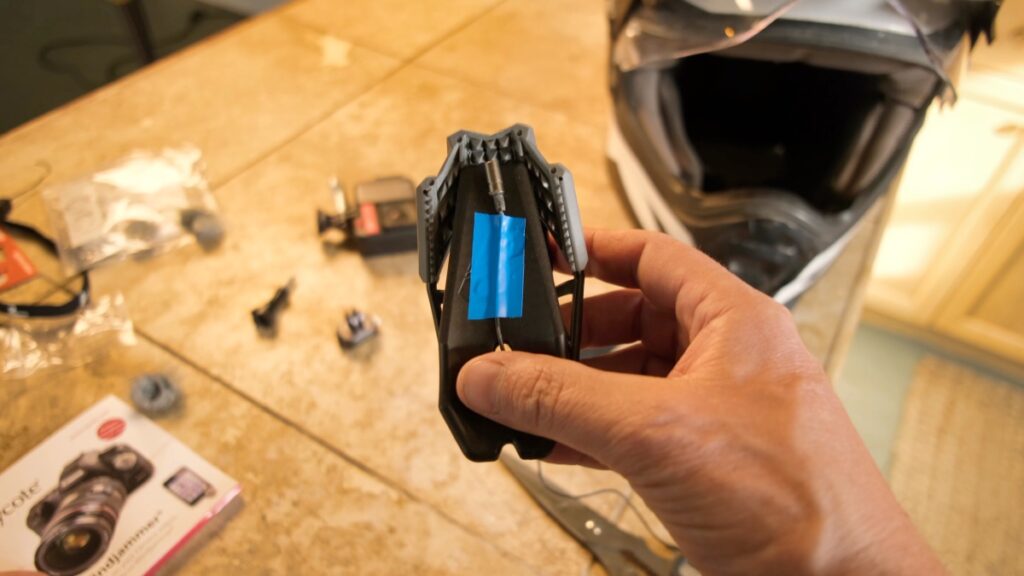
One of the things that is very important to me is recoding good audio from inside of my helmet when I am riding. I use a small lavalier microphone inside of my helmet. It is connected via it’s cable to the mic input on the action camera.
I’ve attached the small microphone to the back of the Dango Designs Gripper, which means it will be in just the right place in front of my mouth to record my audio when I am riding. Furthermore, this means that the microphone stays with the gripper, and is not wired into my helmet. If I want to use a different helmer, I just remove the gripper with the microphone alreaqdy attached to it, and put it on my other helmet. I find this far easier and more convenient than the old way of trying to wire the microphone semi permanently inside of my helmet.
Rycote Windjammer
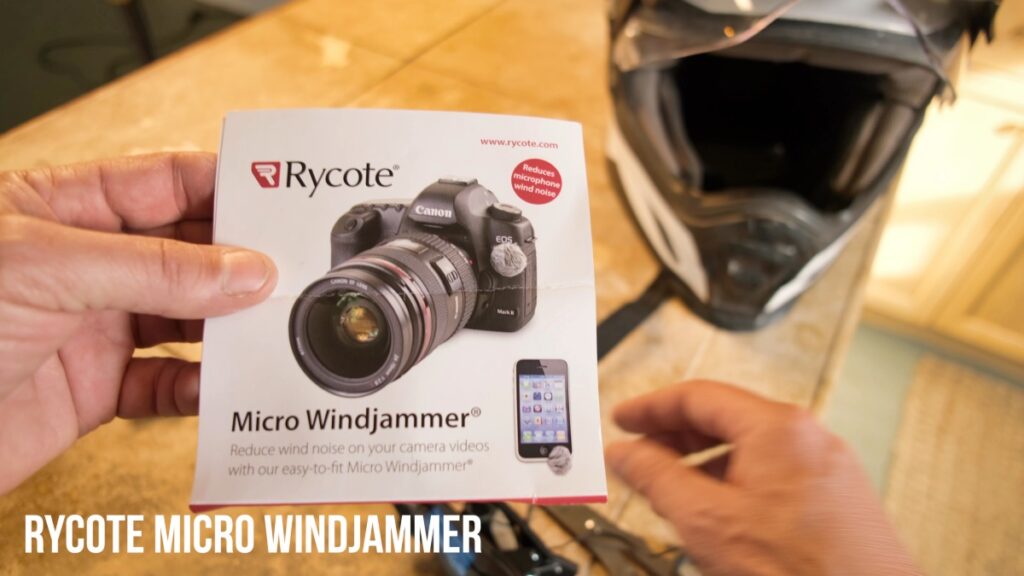
I’ll add a small Rycote micro windjammer on top of the microphone to prevent wind noice. These nifty little covers have an adhesive ring on the back so that they can be attached directly over these small microphones.